ปกติการติดตั้ง Windows Server บน Hyper-V ต้องกด wizard หลายหน้า ต้องรีบกดปุ่มตอนขึ้น Press any key to boot from CD or DVD แล้วนั่งรอหน้าจอ Setup อีกหลายนาที บทความนี้ใช้วิธีที่เร็วและทำซ้ำได้ดีกว่า คือรัน PowerShell สคริปต์เดียว สคริปต์จะสร้าง VM, เขียน Windows ลง VHDX ด้วย DISM, ตั้งรหัสผ่าน Administrator และ login ให้จนเห็นหน้า Server Manager โดยไม่ต้องคลิกอะไรระหว่างทาง
ทั้งหมดนี้ทดสอบจริงบน Windows 11 กับ ISO Windows Server 2025 Standard Evaluation ตั้งแต่รันสคริปต์จนเห็น Desktop ใช้เวลาประมาณ 5–6 นาที
สเปก VM ที่จะได้
| รายการ | ค่า |
|---|---|
| ชื่อ VM / Computer name | WS2025 |
| ที่เก็บไฟล์ | D:\VM\WS2025 (config และ VHDX อยู่โฟลเดอร์เดียวกัน) |
| Generation | 2 (UEFI + Secure Boot) |
| Memory | 8 GB แบบ Static (ปิด Dynamic Memory) |
| vCPU | 4 |
| Disk | VHDX 60 GB แบบ Dynamic, ไดรฟ์ C: ลูกเดียว |
| Network | Default Switch |
| Edition | Windows Server 2025 Standard (Desktop Experience) |
สิ่งที่ต้องเตรียม
- เครื่อง host ที่เป็น Windows 10/11 Pro, Enterprise หรือ Education (Home ใช้ Hyper-V ไม่ได้) หรือ Windows Server ที่ลง Hyper-V role แล้ว
- CPU รองรับ virtualization และเปิดใน BIOS/UEFI แล้ว, RAM ว่างอย่างน้อย 8 GB สำหรับ VM
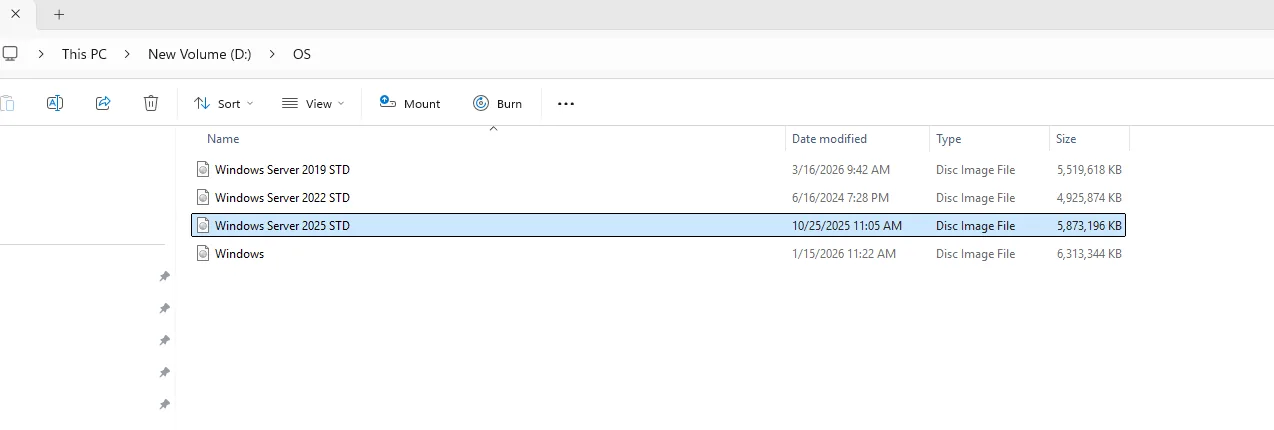
- ไฟล์ ISO ของ Windows Server 2025 ในตัวอย่างนี้เก็บไว้ที่
D:\OS\Windows Server 2025 STD.iso - พื้นที่ว่างบนไดรฟ์ D: อย่างน้อย 15–20 GB (VHDX เป็น Dynamic จะโตตามข้อมูลจริง สูงสุด 60 GB)
- สิทธิ์ Administrator บนเครื่อง host เพื่อรัน PowerShell แบบ Run as Administrator
ขั้นตอนที่ 1: ตรวจว่าเปิด Hyper-V แล้ว
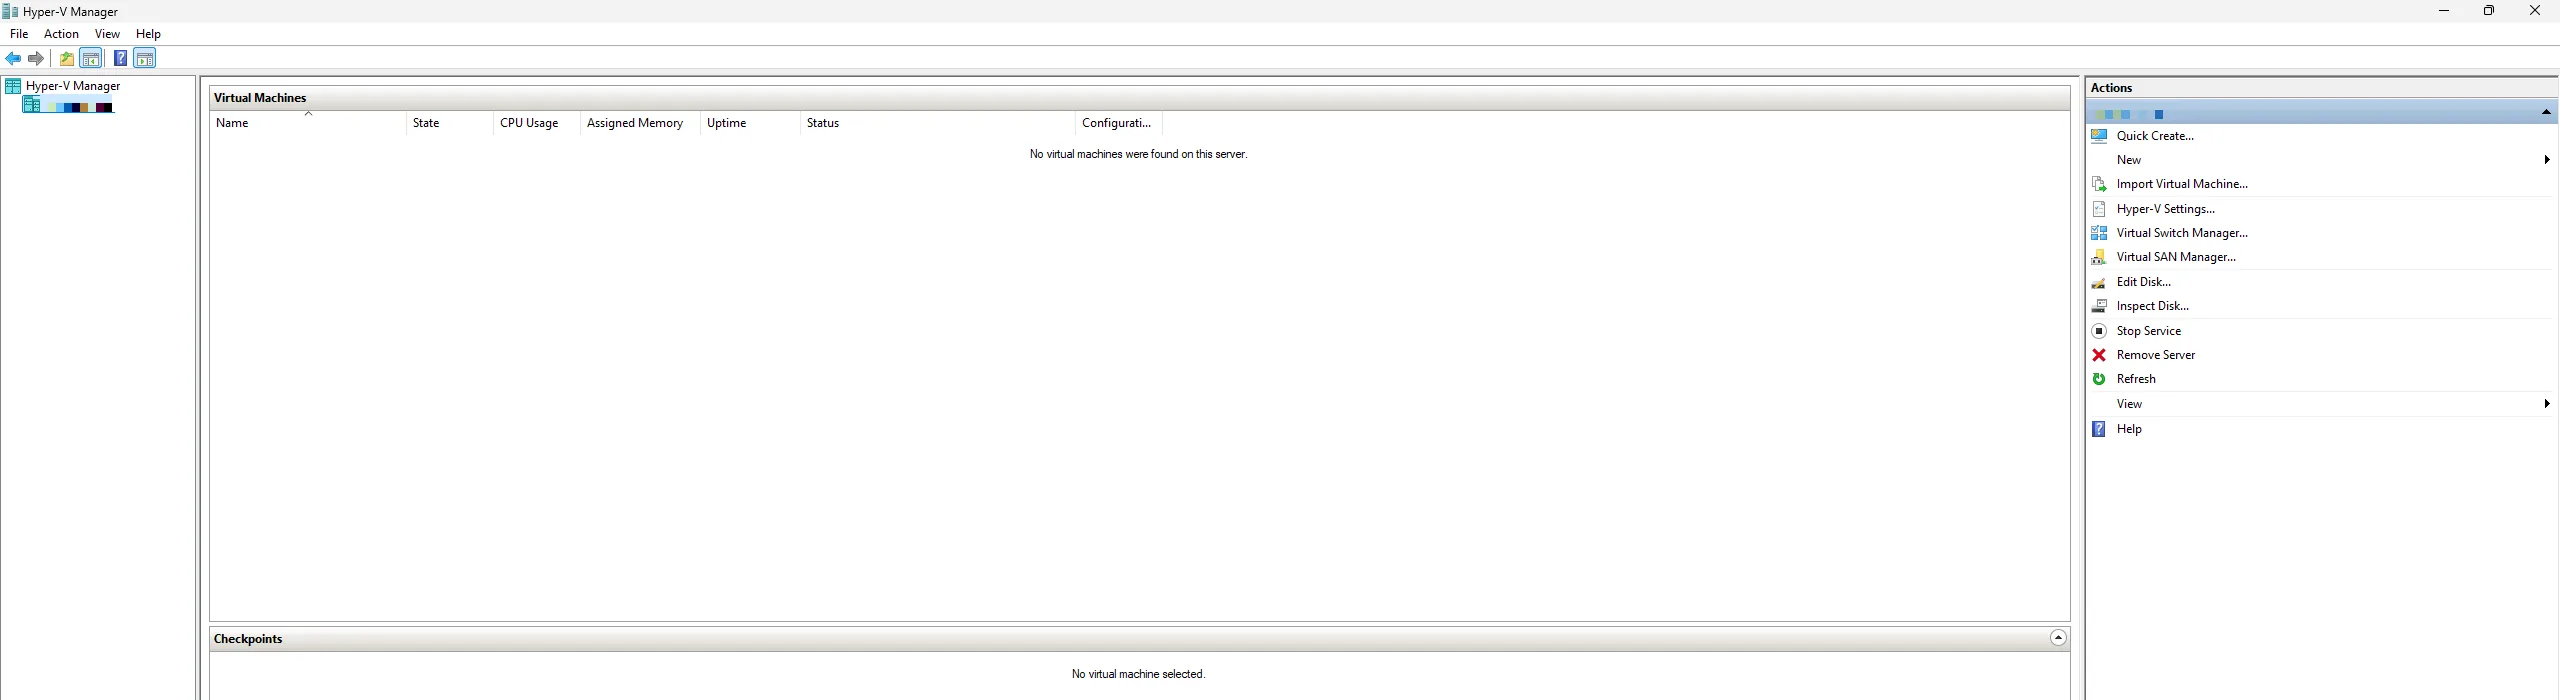
เปิด Hyper-V Manager ถ้าเปิดได้และเห็นชื่อเครื่องอยู่ใต้ Hyper-V Manager แปลว่าพร้อมใช้งาน ถ้ายังไม่ได้เปิด ให้รันคำสั่งนี้ใน PowerShell (Admin) แล้ว restart เครื่อง
Enable-WindowsOptionalFeature -Online -FeatureName Microsoft-Hyper-V -Allสคริปต์ในขั้นตอนถัดไปจะตรวจเรื่องนี้ให้อีกรอบ ถ้ายังไม่ได้เปิด สคริปต์จะเปิดให้แล้วหยุด รอให้ restart ก่อนค่อยรันใหม่
ขั้นตอนที่ 2: บันทึกสคริปต์ New-WS2025-VM.ps1
คัดลอกสคริปต์ด้านล่างไปบันทึกเป็นไฟล์ D:\VM\New-WS2025-VM.ps1 จากนั้นแก้ค่า $AdminPassword = 'CHANGE_ME' เป็นรหัสผ่านที่ต้องการ รหัสผ่านต้องผ่าน complexity policy ของ Windows คือยาวอย่างน้อย 8 ตัว และมีอย่างน้อย 3 ใน 4 ประเภท ได้แก่ ตัวพิมพ์ใหญ่ ตัวพิมพ์เล็ก ตัวเลข และสัญลักษณ์ ถ้ายังเป็น CHANGE_ME สคริปต์จะไม่ยอมรัน
ถ้าบันทึกไฟล์ด้วย Notepad ให้เลือก Encoding เป็น UTF-8 with BOM เพราะในสคริปต์มีคอมเมนต์ภาษาไทย ถ้าไม่ใช้ BOM ตัว Windows PowerShell 5.1 อาจอ่านไฟล์ผิด
<#
.SYNOPSIS
  Build a Windows Server 2025 Standard (Desktop Experience) VM on Hyper-V, fully unattended.

.DESCRIPTION
  1. Checks Hyper-V is enabled
  2. Creates D:\VM\WS2025 (VM config + VHDX live together)
  3. Creates a 60 GB dynamic VHDX, GPT: EFI 260MB + MSR 16MB + C: (rest of the disk, single data partition)
  4. Applies the Desktop Experience image from the ISO with DISM, makes it bootable (bcdboot)
  5. Drops unattend.xml (Administrator password, auto-logon once, computer name, time zone)
  6. Creates a Gen 2 VM: 8 GB static RAM, 4 vCPU, Default Switch, ISO attached, boots from disk
  7. Starts the VM, opens VM Connect and waits until the guest reports a heartbeat

  Run in Windows PowerShell 5.1 or PowerShell 7 "Run as Administrator":
    Set-ExecutionPolicy -Scope Process Bypass -Force
    .\New-WS2025-VM.ps1
#>
[CmdletBinding()]
param(
    [string]$VMName        = 'WS2025',
    [string]$VMRoot        = 'D:\VM',
    [string]$IsoPath       = 'D:\OS\Windows Server 2025 STD.iso',
    [UInt64]$MemoryBytes   = 8GB,
    [UInt64]$DiskBytes     = 60GB,
    [int]   $CpuCount      = 4,
    [string]$SwitchName    = 'Default Switch',
    [string]$AdminPassword = 'CHANGE_ME',          # <-- ตั้งรหัสผ่านของคุณ (ตาม complexity policy)
    [string]$TimeZone      = 'SE Asia Standard Time',
    [string]$EditionLike   = '*Standard*Desktop*'   # Standard (Desktop Experience)
)

$ErrorActionPreference = 'Stop'
function Step($msg) { Write-Host "`n==> $msg" -ForegroundColor Cyan }

# ---------- 0. Pre-checks ----------
Step 'Checking prerequisites'
$isAdmin = ([Security.Principal.WindowsPrincipal][Security.Principal.WindowsIdentity]::GetCurrent()).IsInRole([Security.Principal.WindowsBuiltInRole]::Administrator)
if (-not $isAdmin) { throw 'Run this script in PowerShell "Run as Administrator".' }
if ($AdminPassword -eq 'CHANGE_ME') { throw 'Set -AdminPassword before running.' }

$hv = Get-WindowsOptionalFeature -Online -FeatureName Microsoft-Hyper-V-All
if ($hv.State -ne 'Enabled') {
    Write-Host 'Hyper-V is not enabled. Enabling now - reboot, then run this script again.' -ForegroundColor Yellow
    Enable-WindowsOptionalFeature -Online -FeatureName Microsoft-Hyper-V -All -NoRestart | Out-Null
    return
}
Import-Module Hyper-V

if (-not (Test-Path $IsoPath)) {
    # The file in Explorer may be named without showing .iso - try to find it
    $found = Get-ChildItem -Path (Split-Path $IsoPath) -Filter '*2025*.iso' -ErrorAction SilentlyContinue | Select-Object -First 1
    if ($found) { $IsoPath = $found.FullName } else { throw "ISO not found: $IsoPath" }
}
if (Get-VM -Name $VMName -ErrorAction SilentlyContinue) { throw "VM '$VMName' already exists." }
if (-not (Get-VMSwitch -Name $SwitchName -ErrorAction SilentlyContinue)) { throw "Virtual switch '$SwitchName' not found." }

$VMFolder = Join-Path $VMRoot $VMName
$VhdDir   = Join-Path $VMFolder 'Virtual Hard Disks'
$VhdPath  = Join-Path $VhdDir "$VMName.vhdx"
if (Test-Path $VhdPath) { throw "VHDX already exists: $VhdPath" }

# ---------- 1. Folder ----------
Step "Creating folder $VMFolder"
New-Item -ItemType Directory -Path $VhdDir -Force | Out-Null

# ---------- 2. Find the image inside the ISO ----------
Step "Mounting ISO $IsoPath"
$iso = Mount-DiskImage -ImagePath $IsoPath -PassThru
$isoDrive = ($iso | Get-Volume).DriveLetter + ':'
$wim = @("$isoDrive\sources\install.wim", "$isoDrive\sources\install.esd") | Where-Object { Test-Path $_ } | Select-Object -First 1
if (-not $wim) { throw 'install.wim / install.esd not found in ISO.' }

$image = Get-WindowsImage -ImagePath $wim | Where-Object { $_.ImageName -like $EditionLike } | Select-Object -First 1
if (-not $image) {
    Get-WindowsImage -ImagePath $wim | Format-Table ImageIndex, ImageName -AutoSize
    throw "No edition matches '$EditionLike'. Pick one from the list above."
}
Write-Host "Using index $($image.ImageIndex): $($image.ImageName)"

# ---------- 3. VHDX + partitions ----------
Step "Creating $([math]::Round($DiskBytes/1GB)) GB dynamic VHDX"
New-VHD -Path $VhdPath -SizeBytes $DiskBytes -Dynamic | Out-Null
$disk = Mount-VHD -Path $VhdPath -Passthru | Get-Disk

$used = (Get-PSDrive -PSProvider FileSystem).Name
$free = [char[]]('ZYXWVUTSRQPONMLKJIHGFE') | Where-Object { $used -notcontains [string]$_ }
$sysL = $free[0]; $winL = $free[1]

$dp = @"
select disk $($disk.Number)
clean
convert gpt
create partition efi size=260
format quick fs=fat32 label="System"
assign letter=$sysL
create partition msr size=16
create partition primary
format quick fs=ntfs label="Windows"
assign letter=$winL
exit
"@
$dpFile = Join-Path $env:TEMP 'ws2025-diskpart.txt'
Set-Content -Path $dpFile -Value $dp -Encoding ASCII
diskpart /s $dpFile | Out-Null
if ($LASTEXITCODE -ne 0) { throw 'diskpart failed.' }
Remove-Item $dpFile -Force

# ---------- 4. Apply image + boot files ----------
Step 'Applying Windows image to C: of the VHDX (5-15 minutes)'
Expand-WindowsImage -ImagePath $wim -Index $image.ImageIndex -ApplyPath "${winL}:\" | Out-Null

Step 'Writing UEFI boot files'
& "$env:windir\System32\bcdboot.exe" "${winL}:\Windows" /s "${sysL}:" /f UEFI | Out-Null
if ($LASTEXITCODE -ne 0) { throw 'bcdboot failed.' }

# ---------- 5. unattend.xml ----------
Step 'Injecting unattend.xml'
$pw = [Security.SecurityElement]::Escape($AdminPassword)
$ns = 'processorArchitecture="amd64" publicKeyToken="31bf3856ad364e35" language="neutral" versionScope="nonSxS"'
$unattend = @"
<?xml version="1.0" encoding="utf-8"?>
<unattend xmlns="urn:schemas-microsoft-com:unattend">
  <settings pass="specialize">
    <component name="Microsoft-Windows-Shell-Setup" $ns>
      <ComputerName>$VMName</ComputerName>
      <TimeZone>$TimeZone</TimeZone>
    </component>
  </settings>
  <settings pass="oobeSystem">
    <component name="Microsoft-Windows-International-Core" $ns>
      <InputLocale>0409:00000409;041e:0000041e</InputLocale>
      <SystemLocale>en-US</SystemLocale>
      <UILanguage>en-US</UILanguage>
      <UserLocale>en-US</UserLocale>
    </component>
    <component name="Microsoft-Windows-Shell-Setup" $ns>
      <OOBE>
        <HideEULAPage>true</HideEULAPage>
        <ProtectYourPC>3</ProtectYourPC>
      </OOBE>
      <UserAccounts>
        <AdministratorPassword>
          <Value>$pw</Value>
          <PlainText>true</PlainText>
        </AdministratorPassword>
      </UserAccounts>
      <AutoLogon>
        <Enabled>true</Enabled>
        <LogonCount>1</LogonCount>
        <Username>Administrator</Username>
        <Password>
          <Value>$pw</Value>
          <PlainText>true</PlainText>
        </Password>
      </AutoLogon>
    </component>
  </settings>
</unattend>
"@
$panther = "${winL}:\Windows\Panther"
New-Item -ItemType Directory -Path $panther -Force | Out-Null
Set-Content -Path "$panther\unattend.xml" -Value $unattend -Encoding UTF8

# ---------- 6. Clean up mounts ----------
Step 'Dismounting VHDX and ISO'
Get-Partition -DiskNumber $disk.Number | Where-Object DriveLetter | ForEach-Object {
    Remove-PartitionAccessPath -DiskNumber $disk.Number -PartitionNumber $_.PartitionNumber -AccessPath "$($_.DriveLetter):\" -ErrorAction SilentlyContinue
}
Dismount-VHD -Path $VhdPath
Dismount-DiskImage -ImagePath $IsoPath | Out-Null

# ---------- 7. Create the VM ----------
Step "Creating Gen 2 VM '$VMName'"
New-VM -Name $VMName -Generation 2 -MemoryStartupBytes $MemoryBytes -VHDPath $VhdPath -Path $VMRoot -SwitchName $SwitchName | Out-Null
Set-VMMemory    -VMName $VMName -DynamicMemoryEnabled $false
Set-VMProcessor -VMName $VMName -Count $CpuCount
Set-VM          -Name   $VMName -AutomaticCheckpointsEnabled $false -CheckpointType Production
Add-VMDvdDrive  -VMName $VMName -Path $IsoPath            # keep ISO for features (e.g. .NET 3.5 \sources\sxs)
Set-VMFirmware  -VMName $VMName -FirstBootDevice (Get-VMHardDiskDrive -VMName $VMName) -SecureBootTemplate MicrosoftWindows
Enable-VMIntegrationService -VMName $VMName -Name 'Guest Service Interface'

# ---------- 8. Boot ----------
Step 'Starting VM and opening VM Connect'
Start-VM -Name $VMName
Start-Process "$env:windir\System32\vmconnect.exe" -ArgumentList 'localhost', $VMName

Step 'Waiting for the guest to finish setup (heartbeat)'
$deadline = (Get-Date).AddMinutes(20)
do {
    Start-Sleep -Seconds 10
    $hb = (Get-VMIntegrationService -VMName $VMName -Name 'Heartbeat').PrimaryStatusDescription
    Write-Host "  heartbeat: $hb"
} until ($hb -eq 'OK' -or (Get-Date) -gt $deadline)

if ($hb -eq 'OK') {
    Write-Host "`nDone. $VMName is up and auto-logged on as Administrator (first logon only)." -ForegroundColor Green
} else {
    Write-Host "`nVM started but no heartbeat after 20 min - check the VM Connect window." -ForegroundColor Yellow
}
Get-VM -Name $VMName | Format-Table Name, State, CPUUsage, MemoryAssigned, Uptime -AutoSize
ขั้นตอนที่ 3: รันสคริปต์
- คลิกขวาที่ปุ่ม Start แล้วเลือก Terminal (Admin) หรือ Windows PowerShell (Admin) จากนั้นกด Yes ที่หน้าต่าง UAC
- วางคำสั่งนี้แล้วกด Enter
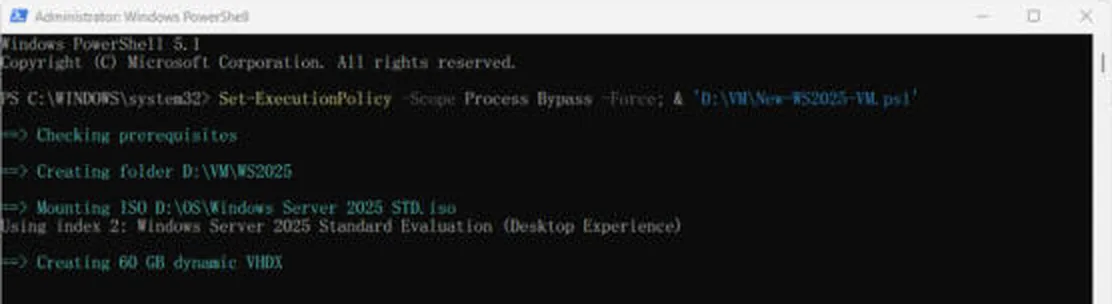
Set-ExecutionPolicy -Scope Process Bypass -Force; & 'D:\VM\New-WS2025-VM.ps1'-Scope Process จะปลด Execution Policy เฉพาะหน้าต่างนี้เท่านั้น ปิดหน้าต่างแล้วค่าจะกลับเป็นเหมือนเดิม ไม่กระทบนโยบายของเครื่อง
สคริปต์จะแสดงขั้นตอนที่กำลังทำทีละบรรทัด บรรทัด Using index 2: ... บอกว่าเลือก edition ไหนจาก ISO ซึ่งควรเป็น Standard (Desktop Experience)
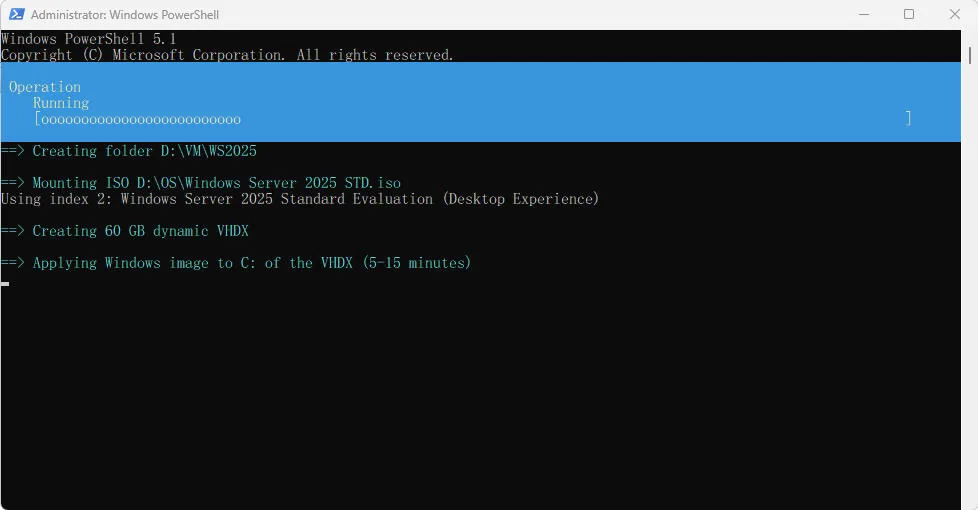
ขั้นที่นานที่สุดคือ Applying Windows image ซึ่งใช้ Expand-WindowsImage เขียน Windows ลงไดรฟ์ C: ใน VHDX ใช้เวลาประมาณ 2–15 นาทีขึ้นกับความเร็วดิสก์
ขั้นตอนที่ 4: ตรวจผลลัพธ์
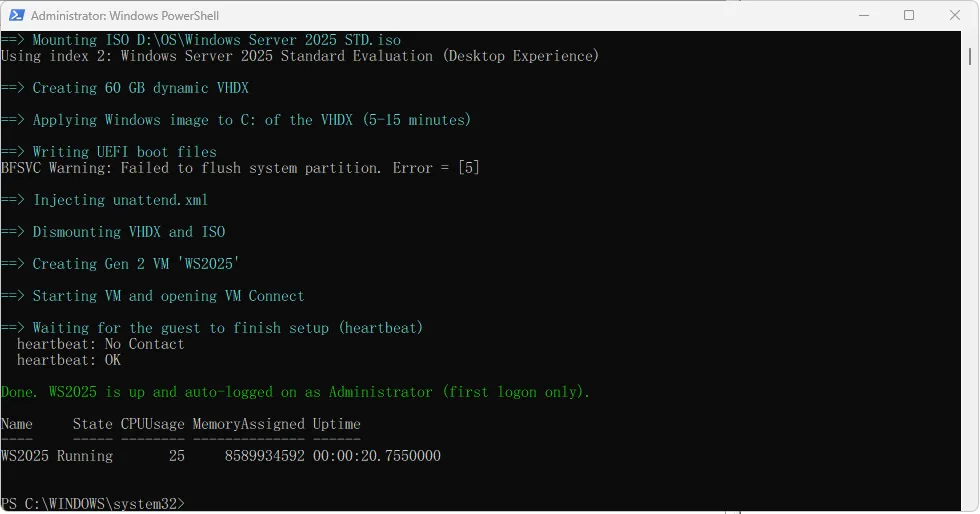
เมื่อเสร็จจะขึ้นข้อความสีเขียว Done. WS2025 is up and auto-logged on as Administrator พร้อมตารางสถานะ VM ซึ่งต้องเป็น Running และ MemoryAssigned เท่ากับ 8589934592 (8 GB)
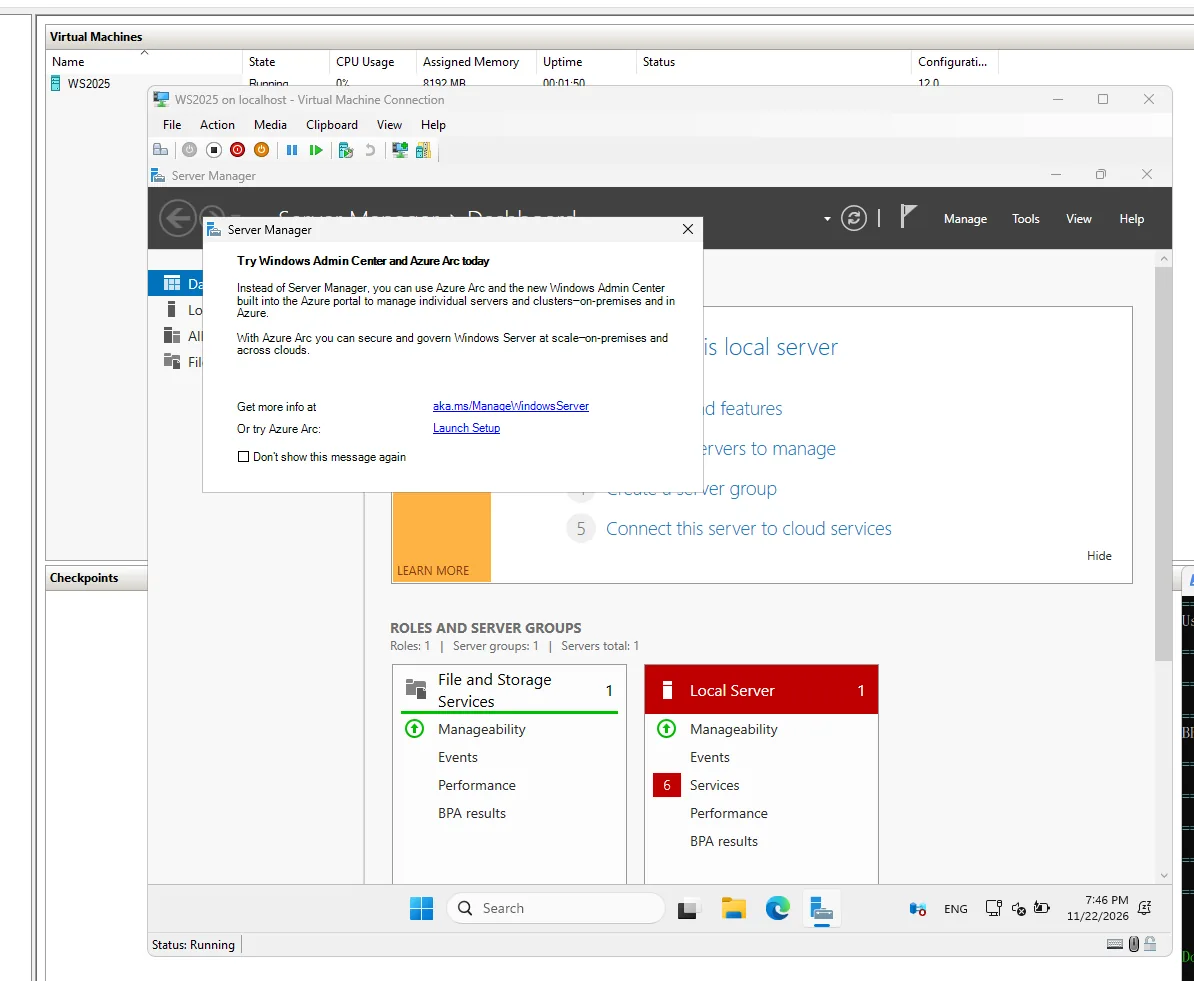
หน้าต่าง VM Connect จะเปิดขึ้นมาเอง VM จะ login เป็น Administrator อัตโนมัติ 1 ครั้งตามที่ตั้งไว้ใน unattend.xml แล้วเปิด Server Manager ขึ้นมา ถึงตรงนี้ก็พร้อมใช้งานแล้ว
สคริปต์ทำอะไรบ้าง
1. แบ่ง partition แบบ UEFI
VM แบบ Generation 2 บูตด้วย UEFI จึงต้องใช้ดิสก์แบบ GPT ที่มี EFI System Partition (260 MB, FAT32) และ MSR (16 MB) เสมอ ส่วนที่เหลือประมาณ 59.7 GB เป็นไดรฟ์ C: ลูกเดียว สคริปต์ไม่ได้สร้าง Recovery partition เพราะใน lab ไม่จำเป็น
2. Apply image แทนการรัน Setup
แทนที่จะบูตจาก ISO แล้วรัน Setup สคริปต์ mount ISO แล้วใช้ Get-WindowsImage หา edition ที่ชื่อตรงกับ *Standard*Desktop* จากนั้นใช้ Expand-WindowsImage เขียนลง VHDX ตรงๆ และใช้ bcdboot สร้างไฟล์บูต UEFI ด้วยวิธีนี้จึงไม่ต้องกด “Press any key” และไม่ต้องผ่านหน้าจอ Setup เลย
3. unattend.xml
ไฟล์ unattend จะถูกวางไว้ที่ C:\Windows\Panther\unattend.xml ใน VHDX ตอนบูตครั้งแรก Windows จะอ่านไฟล์นี้เพื่อตั้งชื่อเครื่อง, time zone (SE Asia Standard Time), คีย์บอร์ด EN/TH, รหัสผ่าน Administrator และ AutoLogon 1 ครั้ง หลังติดตั้งเสร็จ Windows Setup จะลบรหัสผ่านออกจาก unattend ที่เก็บไว้ในเครื่องให้เอง
4. ตั้งค่า VM
Set-VMMemory -DynamicMemoryEnabled $falseล็อก RAM ไว้ที่ 8 GBSet-VM -AutomaticCheckpointsEnabled $falseปิด checkpoint อัตโนมัติที่ Windows 11 เปิดไว้เป็นค่าเริ่มต้น จะได้ไม่เปลืองดิสก์Add-VMDvdDriveแนบ ISO ไว้ใช้ติดตั้ง feature ภายหลัง เช่น .NET Framework 3.5 จาก\sources\sxsSet-VMFirmware -FirstBootDeviceให้บูตจาก hard disk ก่อน DVD
ปรับค่าตอนรันได้
ทุกค่าเป็น parameter จะส่งค่าตอนรันก็ได้ ไม่ต้องแก้ไฟล์ เช่น สร้าง VM ชื่อ WS2025-02 ที่ใช้ RAM 4 GB และ 2 vCPU
& 'D:\VM\New-WS2025-VM.ps1' -VMName 'WS2025-02' -MemoryBytes 4GB -CpuCount 2 -AdminPassword 'รหัสผ่านของคุณ'| Parameter | ค่าเริ่มต้น | ความหมาย |
|---|---|---|
-VMName | WS2025 | ชื่อ VM และ computer name (ไม่เกิน 15 ตัวอักษร) |
-VMRoot | D:\VM | โฟลเดอร์หลักของ VM |
-IsoPath | D:\OS\Windows Server 2025 STD.iso | ที่อยู่ไฟล์ ISO |
-MemoryBytes | 8GB | RAM |
-DiskBytes | 60GB | ขนาด VHDX |
-CpuCount | 4 | จำนวน vCPU |
-SwitchName | Default Switch | Virtual switch |
-EditionLike | *Standard*Desktop* | ใช้ *Datacenter*Desktop* ถ้าต้องการ Datacenter |
หลังติดตั้งเสร็จ
- ISO แบบ Evaluation ไม่ต้องใส่ product key และใช้งานได้ 180 วัน ถ้ามี key ของ Standard แบบ retail หรือ volume ค่อยแปลงด้วย
DISM /Online /Set-Editionภายหลัง - ควรสร้าง checkpoint ไว้ก่อนเริ่มทดลองอะไร เช่น
Checkpoint-VM -Name WS2025 -SnapshotName 'Clean install' - ถ้าจะใช้ VM นี้นอก lab ให้เปลี่ยนรหัสผ่าน Administrator และอัปเดต Windows ให้ครบก่อน
ปัญหาที่พบบ่อย
BFSVC Warning: Failed to flush system partition. Error = [5]
ขึ้นตอน bcdboot เขียนไฟล์ลง EFI partition ของ VHDX ที่ mount อยู่ เป็นแค่ warning ไม่ใช่ error ไฟล์บูตเขียนครบ ถ้า VM บูตขึ้นได้ก็ไม่ต้องทำอะไร
Server Manager แสดง Local Server เป็นสีแดง (Services)
ปกติของการบูตครั้งแรก เพราะมี service แบบ Automatic (Delayed Start) ที่ยังไม่ทันเริ่ม รอประมาณ 5 นาทีแล้วกด Refresh ถ้ายังแดงอยู่ให้คลิกที่ Services เพื่อดูว่าเป็น service ตัวไหน
Virtual switch ‘Default Switch’ not found
Default Switch มีเฉพาะบน Windows 10/11 ถ้า host เป็น Windows Server ให้สร้าง switch ใน Virtual Switch Manager ก่อน แล้วส่งชื่อ switch นั้นเข้าไปด้วย -SwitchName
No edition matches …
ISO แต่ละแบบตั้งชื่อ edition ต่างกัน สคริปต์จะแสดงรายการ edition ทั้งหมดใน ISO ออกมา ให้เลือกชื่อที่ต้องการแล้วส่งเป็น -EditionLike
VM ‘WS2025’ already exists หรือ VHDX already exists
สคริปต์ไม่ทับของเดิมเพื่อความปลอดภัย ให้ลบ VM เดิมใน Hyper-V Manager แล้วลบโฟลเดอร์ D:\VM\WS2025 ก่อน หรือเปลี่ยน -VMName
รันแล้วขึ้น running scripts is disabled on this system
แปลว่าไม่ได้รันคำสั่ง Set-ExecutionPolicy -Scope Process Bypass -Force ในหน้าต่างเดียวกันก่อนเรียกสคริปต์ ให้รันตามคำสั่งในขั้นตอนที่ 3 ทั้งบรรทัด
สรุป
เมื่อเทียบกับการกด wizard วิธีนี้ทำซ้ำได้ ผลลัพธ์เหมือนกันทุกครั้ง และเหมาะกับการสร้าง lab บ่อยๆ ถ้าจะสร้าง VM เพิ่มก็แค่เปลี่ยน -VMName แล้วรันใหม่ ประมาณ 5 นาทีก็ได้ Windows Server 2025 ที่พร้อมใช้งานอีกเครื่อง